Pages

Showing posts with label 10 Days of FRIGHTFULLY Creative Halloween FUN!. Show all posts

Thursday, October 30, 2014

Day 10 of FRIGHTFULLY Creative Halloween FUN!


Day 10 of FRIGHTFULLY Creative Halloween FUN!


Today is the day I start to finish as many Halloween projects as I can!  Then I will pack up Halloween on Sunday and start my Thanksgiving projects!  As I said each year, I try to add more projects to my plastic tub, so I can have an awesome display for next year.  You will notice that many of my projects were basically cardstock, rather than paper packs and that is the reason why!

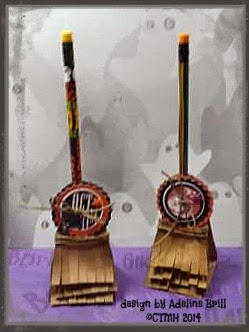
Here is a cute project idea I found on My Favorite Things here.  I did not have the die so I designed one in my Pazzles Inspiration Pro 2014 software.


I hope you have enjoyed my 10 Days of Frightfully Creative Halloween FUN projects!  

Coming soon! ..... the November Stamp of the Month Blog Hop.  Come join the fun!


Wednesday, October 29, 2014

Day 9 of FRIGHTFULLY Creative Halloween FUN!


Day 9 of FRIGHTFULLY Creative Halloween FUN!


Only 3 more days until Halloween is here!  A few of the neighbors have decorated their houses and one is especially SPOOKY!  The project for today is a shaker card.  As I was organizing my Halloween stash, I came across several packages of Halloween Confetti.  I 'googled' and found several Halloween shaker cards and designed mine using a combination of the CTMH Art Philosophy and Artbooking cartridges.

Since I have to design all of my cuts in Design Space, sharing the DS files is easy.  So you can find the Design Space file is here


A Close to My Heart consultant requested a Cricut Craft Room file for the card so she could make it with her Expression 2.  You can download the CCR file here.


The cream colored cut is actually the cut for the acetate to hold all of the shaker pieces in your card.  The colors I used are Sunset, Honey, Black and White Daisy.  The stamp set is again the Moonlight WOTG stamp set - an oldie but a goodie!


The extra tag was just floating around in my stash as well...


Card Inside


I hope you have enjoyed my Frightfully Creative FUN event.  Not only have I added to my Halloween bucket of goodies but I am using up my stash as well! But not to worry, I still have plenty!


Tuesday, October 28, 2014

Day 8 of FRIGHTFULLY Creative Halloween FUN!

                         Day 8 of FRIGHTFULLY Creative Halloween FUN!

This little treat box has FUN written all over it!  Do you need a quick little project for a co-worker?  Then this is for you!


I used the "Chalk It Up" B & T paper for the starry background of the box and I grunged up the Whisper cardstock with black stamped images and some ink.

I added the August SOTM images to the treat box and finished it off with a velcro dot!

The cartridge I used was the CTMH Artiste and you can pick up the  Design Studio file here for this project.


Another new design idea coming tomorrow...


Monday, October 27, 2014

H2H Challenge and Midnight

Day 7 of FRIGHTFULLY Creative Halloween FUN!


Today's post was inspired by the theme "Midnight" for this week's H2H Challenge. The word  Midnight does conjure up images of dark, scary nights.... but I knew right away what I wanted to do when I saw this bottle of wine sitting on my Target shelf!


One of my FAV-orite wines ...

I wanted to make some wine charms but not the traditional ones with a wire but a paper version.  I found these as I was 'googling' wine charms.  Have you noticed how that word has turned into a verb rather than an noun?  OK- you didn't pay attention in English class!

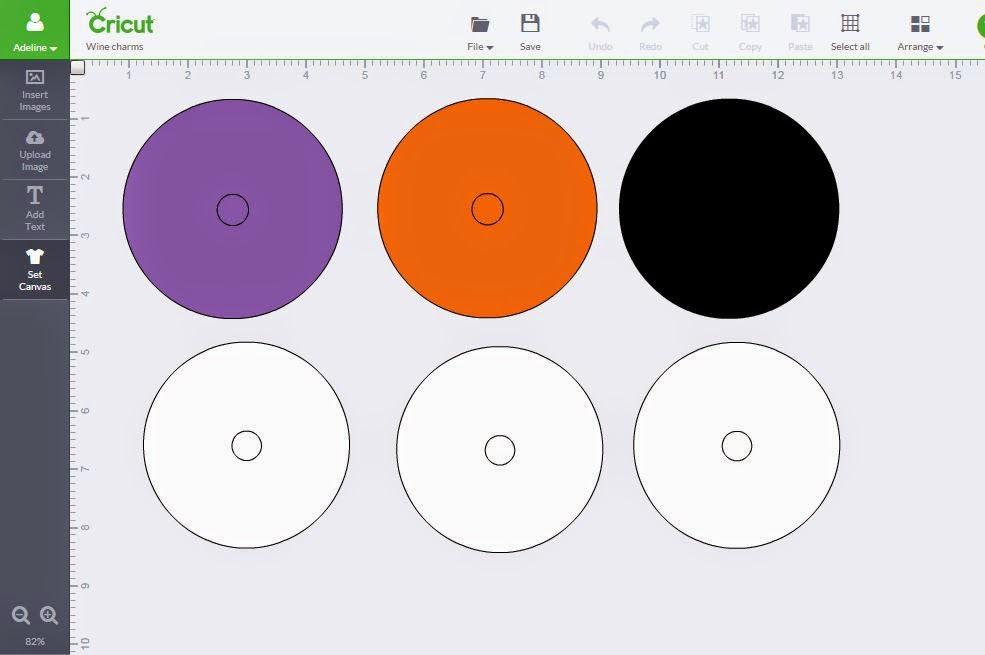
So I created this quick and easy Cricut Design Space file you can find here.  The circle in the middle is .5" and you may have to change it to fit your wine glass stem.

It is a simple 3.5 circle with a 3.0 circle center. The center circle varies from .5 to .65 to accommodate the width of the stem. Easy!


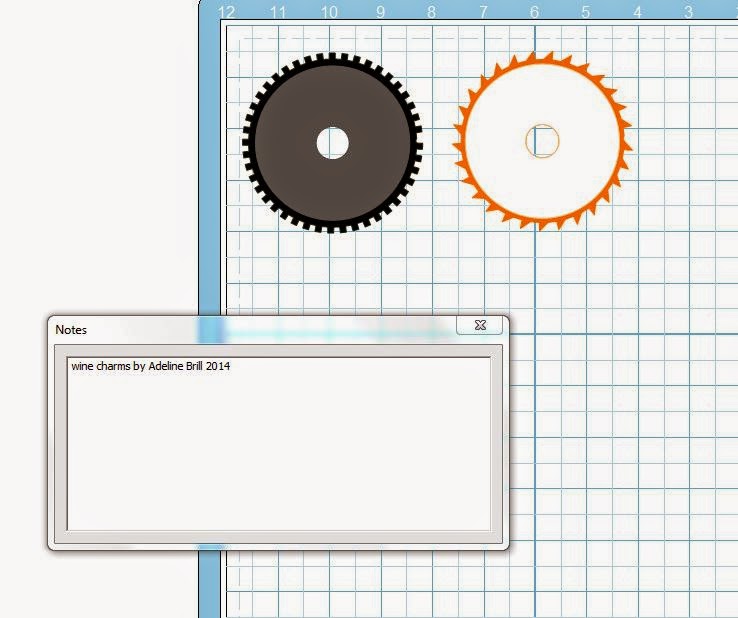
Did you notice that the one charm has a decorative edge to it?  I created that wine charm in the Pazzles Inspiration Pro 2014 software using the Decorative Tools option - the lesson today with the amazing Klo!

I love the 'notes' function in this new software - I can add my own comments or add where I found the file.

You can find the files here..
Wine Charms wpc file here
Wine Charms pvg file here
Wine Charms svg file here

Since I never sell a Halloween stamp set, I have two retired stamp sets featured here- sorry!

Supplies:
Black and White Daisy cardstock
Scaredy Cat B & T paper
Lola B & T paper
Ink colors - Slate, Black, Gypsy,Honey

Stamp sets:
B1281 Hallow-Scream (retired)
C1512 Moonlight Scrapbooking Workshop (retired)
D1605 Halloween Greetings
B1453 Frightfully Fun
B1429 Eek & Shriek

Why don't you play along with us this week and use the theme- "midnight".  I would love to see what you come up with!

Here is the linky so you can link up your artwork.


Sunday, October 26, 2014

Day 6 of FRIGHTFULLY Creative Halloween FUN!


Day 6 of FRIGHTFULLY Creative Halloween FUN!


Boo...hoo...hoo...  I have been working on today's projects for a few days.   I decorated my home about a week ago and I found this tissue box project that I had several years ago.  I found the original idea on SplitCoast stampers here.  At the time, I had just started my blog and I don't remember posting this project.  So I decided to update it to a 21st century version.


A friend of mine had given me some 'swankies' or Halloween Hankies.  I was going to design a file for them but then decided to make the tissue box cover instead.


I knew that I didn't have to cut it out and score it by hand like the original directions. So I designed the first file in my Pazzles InVue software.  This software is designed so that I can actually measure the sizes accurately.

The Pumpkin Tissue Box looks like this....

Pumpkin Tissue Box wpc file here
Pumpkin Tissue Box pvg file here 
Pumpkin Tissue Box SVG file here.


The Frankie Tissue Box looks like this....  

Frankie Tissue Box wpc file here
Frankie Tissue Box pvg file here
Frankie Tissue Box SVG file here


I was able to create the jagged hairline using the decorative scissors option in the Pazzles Inspiration Pro 2014 software.  The face features were created using weld, subtract weld and with the frankie mouth I used the Intersect weld feature on the Pazzles InVue software.  Our amazing Klo taught this lesson last Sunday and this was a perfect use of that very lesson!


I saved it as an SVG but the Cricut Design Space was not reading it accurately enough so I had to start with the basic shapes and recreate the entire file.  I had to tweak the original design a few times to make sure the score lines were in the correct places.  


Here is a picture of the Cricut Design Space file.  You can find the file here  The faces are from the CTMH Artiste cartridge and the oval is from the CTMH Art Philosophy cartridge.  You can certainly substitute a file you already 'own'!


Unfortunately in Design Space you can not add a cut line like you can in the Pazzles software, so you are going to have to snip the corners with a pair of scissors.


I hope you enjoyed this creative fun Halloween project.  Leave me a comment if you cut any of the files out.  The assembly is rather easy and you can always refer back to the Splitcoast video.  I inked up the sides and sanded Frankie's hair for additional accents.


Tomorrow....Midnight and the H2H challenge!

Saturday, October 25, 2014

Day 5 of FRIGHTFULLY Creative Halloween FUN!

Day 5 of FRIGHTFULLY Creative Halloween FUN!


Today's idea is a 'blast from the past'!  I figured everyone needed a quick project idea for the weekend and this is perfect.


I decided to play around with the canvas side of Design Space and found a collage frame to revisit this original file.  The designs are from one of my favorite Cricut cartridges - Paper Dress Up Dolls


You can find the Design file here.   Now all you have to do is find the frame  and paint it orange!

Coming tomorrow....Boo..Hoo Hoo!


Friday, October 24, 2014

Day 4 of FRIGHTFULLY Creative Halloween FUN!


Day 4 of FRIGHTFULLY Creative Halloween FUN!


One of my absolutely favorite broadway plays is "Wicked".  Sadly , I have only seen it in Tampa, but that's OK!  This title was perfect for the layout that I created for an H2H Challenge in August. - Inspired by a book.

More often that not, I will design my layouts in one of my programs so I can have a visual of what it will look like when it is completed.  In this case I found a sketch on http://paper-secrets.blogspot.com and used that as my starting point.


I actually started with scraps and then designed it in the Cricut Design Space using the included scrapbook canvas.  I also added some stamping because my layout looked naked!


As you can see it is not exactly like the layout but that is the best part!

The design file for the Cricut Design Space is here..  Feel free to use it but you must have the Mini Monsters cartridge to cut it out.  The shapes are from the Cricut Craft Room Basics which are free to everyone who has DS. You can certainly substitute any designs that you think will work with it!  Here is the same exact layout with different colored cardstock and other designs from the Mini Monsters cartridge.  I think you get the idea!


Here is this month's sketch challenge.  This looks like an easy one.  Why not give this a try yourself!  Check out the additional information on their blog here.


Coming tomorrow.....  BOO...who?


Thursday, October 23, 2014

Day 3 of FRIGHTFULLY Creative Halloween FUN!


Day 3 of FRIGHTFULLY Creative Halloween FUN!


I hope you are having FUN!!  When I was growing up, I remember one summer night a bat flew into our house!  My sister and I were upstairs in our bedroom and my mom was screaming like a banshee!  We ran out to the hallway to see what was going on!  By then the bat had flown upstairs and we grabbed towels and wrapped them around our head and tried to beat it outside with a broom!   I am still laughing as I write this but I think we were probably freaking out then!

I am not really frightened by bats so my few bat project projects today are just fun to help celebrate the season!

The first pic is made slightly ghouly with the help of picmonkey.  This program is easy and I can make some basic changes at no charge!  Check it out here


This little bat treat box is a collection of treat boxes that are FREE when you subscribe to the Pazzles Craft Room.  To me the monthly subscription is worth giving up a few lattes!  Check out the Pazzles Craft Room site here.

                                  Halloween Treats Cutting Collection


The next project is also a free craft room member project by Joanna , the incredibly talented Pazzles Design Team member.  She is the expert when it comes to 'Print then Cut' but she also recreates some awesome projects using the existing files in the craft room.  Check out her post here for the Bat Tube favors.


I played around with picmonkey again to add the bats and some additional ghoulish effects. 

The skeleton is from the CTMH Artiste cartridge.  Since there is no shadow feature on this cartridge, I cheated and glued it onto some black cardstock and cut around the shape!

Enjoy....  tomorrow - "Which Witch is Which?"


Wednesday, October 22, 2014

Day 2 of FRIGHTFULLY Creative Halloween FUN!

                  Welcome to Day 2 of FRIGHTFULLY Creative                                           Halloween FUN!


Who's your mummy?........

One of the classes that I taught was Child Development.  I loved doing Arts and Crafts with my high school students in class because you could tell they were having fun but just didn't want to admit it!

One year I made this Mummy Can to sit on my desk and hold little containers of Play Dough.  They were allowed to play with them (as long as they didn't mix up the colors!!)


I have no idea where this project came from as this was long before Pinterest! (It is probably a good thing because I would never have had time to grade papers!) 


This is an easy project to make - a bit of gauze, cotton balls for the 'nose' and some black, white and red scraps of cardstock along with a 6" square of Halloween paper. I purchased the paint cans from Home Depot - circa 2007.

Step #1:


Wrap gauze half way down the paint can - I secured it with tape in the back and then tucked it under in the front.

Step #2:
oh no!....  "The Man Without A Face!


Add 4-5 cotton balls and then wrap another section of gauze to cover the entire can.

Step#3:
Cut out the eyes and tongue and tape or glue to the gauze. I taped the paper onto the lid using permanent scotch tape. Add some ribbons to the handle and fill your mummy with candy or play dough!


The link for the Cricut Explore Design Studio file is here .  The circles are from the Craft Room Basics and the tongue is from the CTMH Cricut Art Philosophy cartridge.


But WAIT! - there's more....  for my Pazzles 'peeps',  here are the files for both the Inspiration and the Vue...


You can pick up the pvg file here...


You can pick up the wpc file here  I also created an svg file - I hope this will work!  You can pick up the svg file here.

I hope you enjoyed some "mummy' love!

Tomorrow.... 
                       "Going batty"


Tuesday, October 21, 2014

Day 1 of FRIGHTFULLY Creative Halloween FUN


Welcome to Day 1 of FRIGHTFULLY Creative Halloween FUN!


When I was 'surfin' the net the other day I came across Dawn's blog post here and I thought - what a cute idea! ( She does give Dee credit, as well)  Honestly, I love the fact that so many ladies are willing to share their ideas!  Thank you Dawn for a great video!

My first "FUN" project is this French Fry Frankie treat box.  I found this Halloween decor as the perfect backdrop for my treat box at the Bernina Sewing Center in Tampa, FL. (Frankie's hair is actually black...I miss my Nikon...)


This was a quick and easy project that I designed and cut with my Cricut Explore.  Since I sold my Cricut Expressions 2, I no longer use CCR. I used the Cricut Art Philosophy cartridge but there is also a French Fry box in Tags,Bags and Boxes More 2.


Here are the sizes for the circles:
White Circles - 3/4"
Olive Circles - 3/4"
Black Circles - 1/2"

I sized the french fry box to approximately W= 5.00 and H= 8.25. You can adjust it to a size to suit your needs but you may have to enlarge the eyes and eyelids.


I hope you give this quick and easy treat box a try.  If you have the Cricut Explore here the link to the Design Space file.

Then I decided to try and design my own file using my brand NEW Pazzles InVue software.  I found a free file online and created the pvg. file for my "Pazzles" peeps!  The pvg file can be found here  The wpc file can be found here.


Here are the two 'Frankies'  hangin' out until Halloween...... The Pazzles version is on the left and the Cricut version is on the right.  The Pazzles Frankie is definitely larger and can hold the 'Mega' M & M's ( hmmm - who ate them before the photo shoot?...)


Enjoy and please leave me a comment if you want to see more!

Coming tomorrow - "Who's your mummy?"....