Pages

Showing posts with label Cricut Artiste cartridge. Show all posts

Sunday, November 2, 2014

H2H NO-vember Scrapbook Challenge

Oh NO, it's NO- vember and this month is full of No-Nos!  The first NO Challenge for NO-vember is NO B & T paper.  Many times for me, this is not a crisis and this week proved to be no exception.

I have been eyeing the one page layout on page 108 of the Annual Inspirations and I thought this would be a perfect week to create my own layout.  I have many pages to finish of my son's wedding album and I thought this page would give me the motivation to start working on it again.

I designed the layout in Design Space and then adjusted the colors to match the color scheme of the wedding.  I can see this layout used for anniversary, birthday and other meaningful events.


The Cricut Design Space file is here

Supplies:
page 108 of the Annual Inspirations - Pattern 10 from Make It From Your Heart Volume 2
Cardstock includes White Daisy, Slate, Whisper, Sweet Leaf and Outdoor Denim
Inks include Sweet Leaf, Whisper and Slate
Z1932 Silver Geometric Washi Tape
Stamp set - D1539 The Happy Couple
CTMH cartridges- Art Philosophy, Artbooking and Artfully sent

Here is my finished layout...

Pleas join us in NO-vember for any of the challenges.  You can find the linky here for this one.

Stay tuned for tomorrow's post - the second page to this layout!


Wednesday, October 29, 2014

Day 9 of FRIGHTFULLY Creative Halloween FUN!


Day 9 of FRIGHTFULLY Creative Halloween FUN!


Only 3 more days until Halloween is here!  A few of the neighbors have decorated their houses and one is especially SPOOKY!  The project for today is a shaker card.  As I was organizing my Halloween stash, I came across several packages of Halloween Confetti.  I 'googled' and found several Halloween shaker cards and designed mine using a combination of the CTMH Art Philosophy and Artbooking cartridges.

Since I have to design all of my cuts in Design Space, sharing the DS files is easy.  So you can find the Design Space file is here


A Close to My Heart consultant requested a Cricut Craft Room file for the card so she could make it with her Expression 2.  You can download the CCR file here.


The cream colored cut is actually the cut for the acetate to hold all of the shaker pieces in your card.  The colors I used are Sunset, Honey, Black and White Daisy.  The stamp set is again the Moonlight WOTG stamp set - an oldie but a goodie!


The extra tag was just floating around in my stash as well...


Card Inside


I hope you have enjoyed my Frightfully Creative FUN event.  Not only have I added to my Halloween bucket of goodies but I am using up my stash as well! But not to worry, I still have plenty!


Tuesday, October 28, 2014

Day 8 of FRIGHTFULLY Creative Halloween FUN!

                         Day 8 of FRIGHTFULLY Creative Halloween FUN!

This little treat box has FUN written all over it!  Do you need a quick little project for a co-worker?  Then this is for you!


I used the "Chalk It Up" B & T paper for the starry background of the box and I grunged up the Whisper cardstock with black stamped images and some ink.

I added the August SOTM images to the treat box and finished it off with a velcro dot!

The cartridge I used was the CTMH Artiste and you can pick up the  Design Studio file here for this project.


Another new design idea coming tomorrow...


Sunday, October 26, 2014

Day 6 of FRIGHTFULLY Creative Halloween FUN!


Day 6 of FRIGHTFULLY Creative Halloween FUN!


Boo...hoo...hoo...  I have been working on today's projects for a few days.   I decorated my home about a week ago and I found this tissue box project that I had several years ago.  I found the original idea on SplitCoast stampers here.  At the time, I had just started my blog and I don't remember posting this project.  So I decided to update it to a 21st century version.


A friend of mine had given me some 'swankies' or Halloween Hankies.  I was going to design a file for them but then decided to make the tissue box cover instead.


I knew that I didn't have to cut it out and score it by hand like the original directions. So I designed the first file in my Pazzles InVue software.  This software is designed so that I can actually measure the sizes accurately.

The Pumpkin Tissue Box looks like this....

Pumpkin Tissue Box wpc file here
Pumpkin Tissue Box pvg file here 
Pumpkin Tissue Box SVG file here.


The Frankie Tissue Box looks like this....  

Frankie Tissue Box wpc file here
Frankie Tissue Box pvg file here
Frankie Tissue Box SVG file here


I was able to create the jagged hairline using the decorative scissors option in the Pazzles Inspiration Pro 2014 software.  The face features were created using weld, subtract weld and with the frankie mouth I used the Intersect weld feature on the Pazzles InVue software.  Our amazing Klo taught this lesson last Sunday and this was a perfect use of that very lesson!


I saved it as an SVG but the Cricut Design Space was not reading it accurately enough so I had to start with the basic shapes and recreate the entire file.  I had to tweak the original design a few times to make sure the score lines were in the correct places.  


Here is a picture of the Cricut Design Space file.  You can find the file here  The faces are from the CTMH Artiste cartridge and the oval is from the CTMH Art Philosophy cartridge.  You can certainly substitute a file you already 'own'!


Unfortunately in Design Space you can not add a cut line like you can in the Pazzles software, so you are going to have to snip the corners with a pair of scissors.


I hope you enjoyed this creative fun Halloween project.  Leave me a comment if you cut any of the files out.  The assembly is rather easy and you can always refer back to the Splitcoast video.  I inked up the sides and sanded Frankie's hair for additional accents.


Tomorrow....Midnight and the H2H challenge!

Tuesday, February 4, 2014

Cricut Craft Room Basics 101

Come join me for this lecture/demo class this Friday!  Even though Provo Craft is introducing a new cutter and software this month on HSN, many of us will still take advantage of the FREE software download called Cricut Craft Room.  It is a pretty basic software class but there are many useful tips that you will receive when you join us.

Here is one of the cards that I will be demonstrating the "Hide Contour" tool function...
This card was a copy from an issue of Papercraft magazine and it is all designed in CCR using Close to My Heart's Artiste cartridge.  You will receive all of the files for the projects so you can go home and cut them out yourself!  Here is what the file looks like!

Be sure to RSVP by February 6th!!

When:  February 7th
Where:  My home
Time: 6-8:00 p.m.
Cost: $10.00
What to bring?:  a USB stick for all of your free designs  ...you do not need to bring your Cricut!


Please email me your RSVP by Feb. 6th!

Tuesday, January 14, 2014

AWA Workshop in January

We had a great time this past weekend with the Sarita WOTG.  Elizabeth and her co-workers were participating in a team building event recently and they are truly a crazy bunch!


The "In Love" sentiment did not really work with this layout, so I covered it up with a moustache from the Cloud Nine stamp set.

I used the CCR (Cricut Craft Room) to create all of the cuts for the page and it was quick and easy to cut the kits for my ladies!

You can download the file here if you would like to have the quick and easy cuts as well.

Supplies:
Sarita Workshop to Go - "retiring" on January 31st!
Cloud Nine stamp set- only $15.00 with a $35.00 order!

If you are interested in grabbing up some of the WOTG paper packs, NOW is the time to do it!  You can shop in your jammies on my website here


Enjoy!!

Friday, April 26, 2013

It's A DREAM POP Blog Hop!!

Welcome to the National Scrapbooking Month celebration!  Today 35 Close to My Heart consultants in the US and Canada  are  celebrating the release of the NEW Dream Pop collection.  I absolutely LOVE it!!  So bright and current to today's trends.

If you have been hopping with everyone else, then you have arrived from Heather's blog and checked out her awesome design!  This paper pack is surely going to be a hit.


The colors are so vibrant and bring out the best in all of the new spring and summer fashions and home decor.  In honor of National Scrapbooking Month, you can get a special paper packet for only $10 when you spend $35 in May (valued at $19.95 retail). 


This paper packet includes 12 cardstock sheets as well as 12 B & T Duos® papers that were specifically designed for this promotion.  Start National Scrapbooking Month off right with a unique paper packet at a bargain price and get your creative juices flowing!  

I dug out my cruise photos because I knew there were a few pictures that I thought would coordinate with this packet pack.  Even though, this is not a red and white paper theme - it went perfectly with my Valentine Cruise Formal dinner photos!  Here is my layout...

 ( click on the photo above for a larger view)

Supplies:
Dream Pop paper pack
C1534 Sightseer stamp set
C1441 - Affection stamp set
Art Philosophy cartridge - frame
Artiste cartridge - title
Z1839 Glitter Paper
Z1764 floret Paper Flowers
Z1787 Mini-Medley Accents - Slate
CTMH Embroidery floss - retired
Inks- Cotton Candy, Lagoon, Honey and Slate

Remember this special does not start until May 1st and supplies are limited!!  If you are interested in hosting a gathering - online or in your home - hostesses receive one paper packet free with qualifying May Gathering sales totals of $400 or more.

Now it is off to Wendy's blog where I know you find are going to find tons of cuteness and inspiration!

Wednesday, April 17, 2013

April Claire Workshop and the Cricut!

Sometimes I think it is funny how my mind 'channels' the thoughts of Close to My Heart!  In my Cricut workshop on April 7th, we practiced using many of the function buttons which Christine explains in this video!!  Take a look at it and see if you agree!


Here is the layout that I created for the April workshop using the "Make It From Your Heart" layout and the Claire paper pack.


The title tag  was quick and easy in the Cricut Craft Room..  Just weld the banner shape in the AP cartridge along with the lettering from the Artiste cartridge and viola!


Here is the last card from the Cricut Basics class created by Sharon.  It required 20 hearts for the design - just use the Quantity button and cut them out all at once! The original design can be found on page 102 of the IB.


Enjoy!!

Friday, April 12, 2013

Cricut Basics Class 101 and Today's Special Value!

What an interesting class we had!  I actually learned so much and I ended up buying a Cricut Expressions 2 because it is actually much better than the Cricut Expression and I knew I had to learn it if I was going to teach the class!

The first card project had so much learning going on  - how to create nested images (without a shadow button), using the Flip button, the Settings, Fit to Length, Portrait and Repeat Last buttons.

Here are the sample cards...


This card we used the Cricut pens along with the Center Point button


This card we used the Mix 'n Match button to create several shapes in one cutting...


This is a very cute idea for spring (although summer has arrived in Tampa!) and you can find the directions here for both designs on the  CTMH site here

                    
Create a festive banner to complement the OWL party bags....


Today's Special Value!  

Purchase the Z1790 Cricut Artiste Collection or the Z1686 Cricut Art Philosophy and receive the directions for the class FREE!!  You will also receive a April SOTM for $5.00!  (P.S. I love this set!!)


You can shop for your cartridges here....  if you are interested in checking out the Artiste Assembly handbook, there is a pdf file in the side bar- check it out!  If you have trouble downloading it - please email me!

Here are the pdf files for the two cartridges.....


Here are some more designs are from the Artiste cartridge...aren't they cute?!!  Any questions, just call or email me!!

Enjoy!

Friday, December 7, 2012

December Workshop

It is Holiday time!!  Get ready for the holiday with this month's projects.  We will be using the Pear and Partridge paper pack- definitely a vintage look to the paper.

The layout is from the 9035 Make It from Your Heart Book - and my little ones are all dressed up for their Holiday photo shoot!
(click on picture for a larger view of the layout)

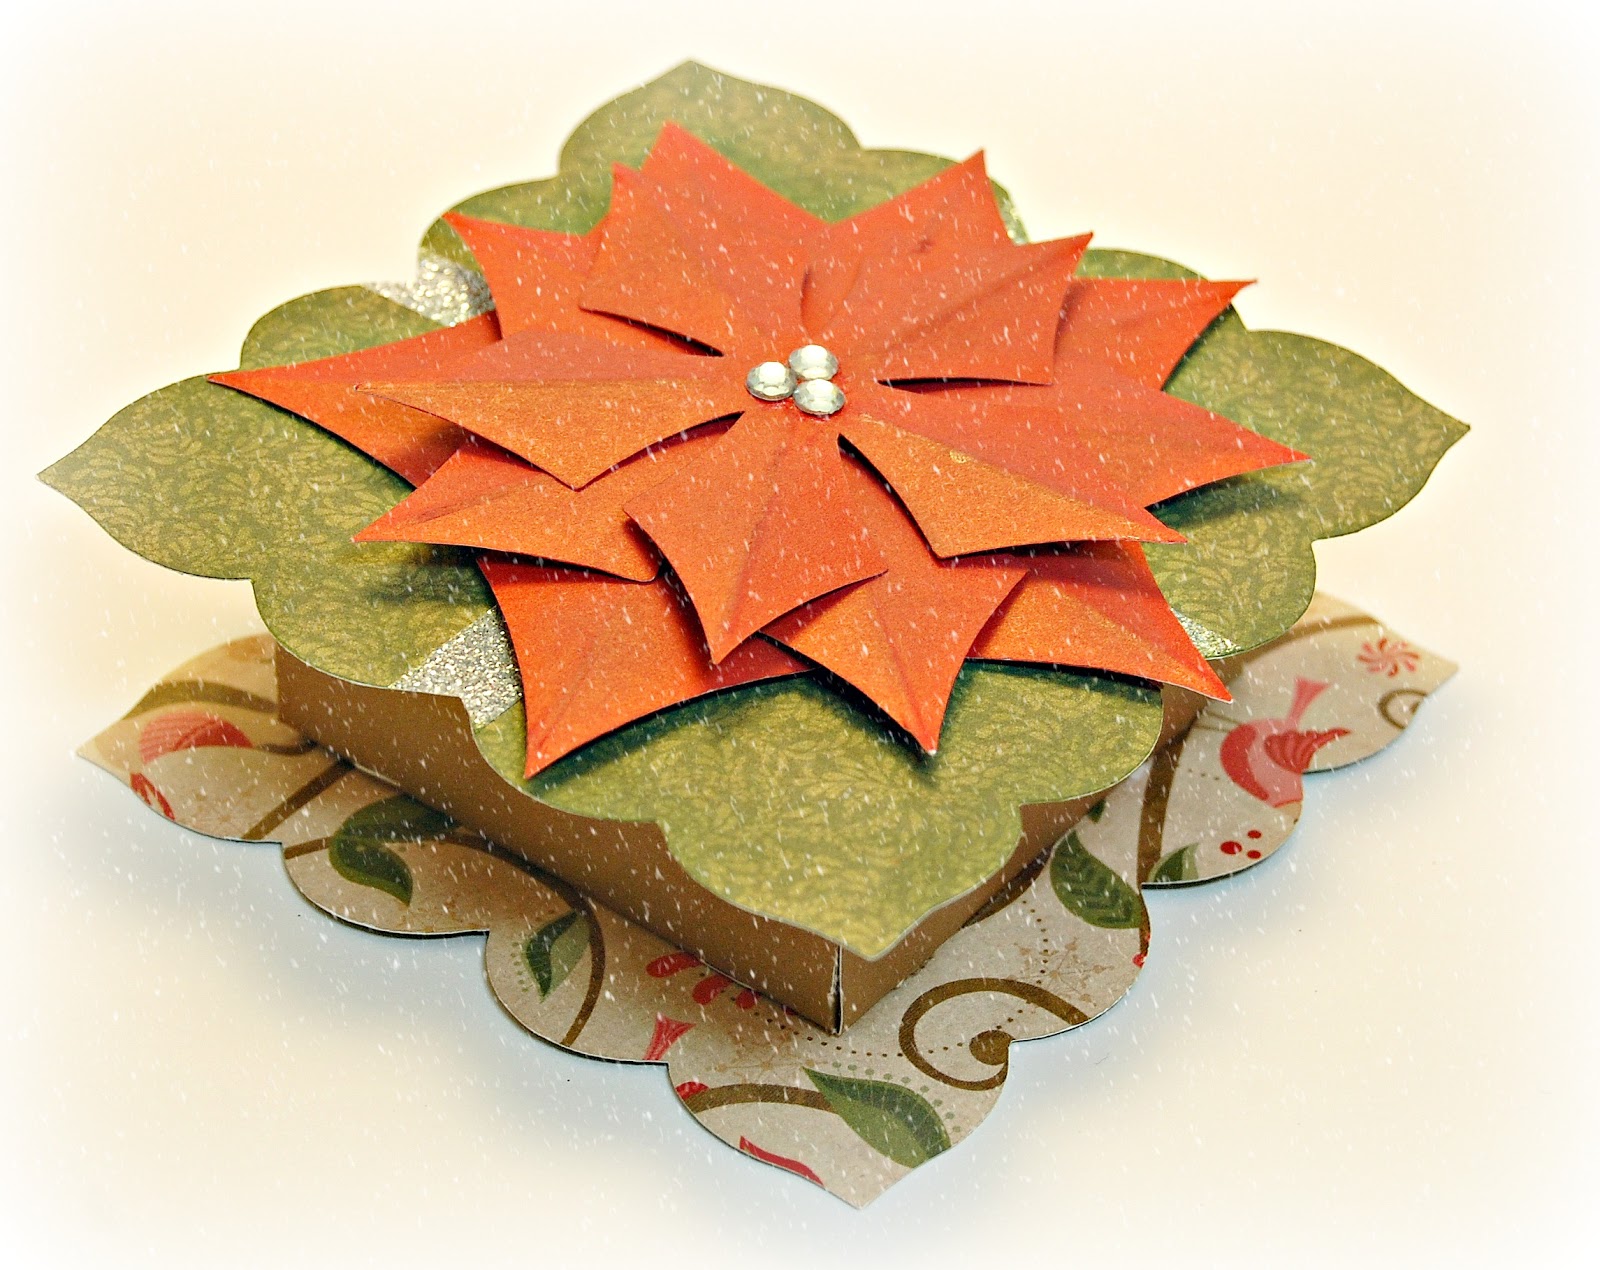
We will also be making a tag for your gift packages  and a little  gift box, perfect for a small trinket!

The gift tag uses S1212 year Round Cheer - the December SOTM.


Please RSVP by Wednesday 12/12/12!! so I can have all of the kits ready for you on Friday night


Here are the details:
What:  December Make It from YOUR Heart Workshop
When:  December 14, 2012 from 6-9:00 p.m.
Where:  my home - email me for directions Sweetaline@verizon.net
How much?: $10.00

Come enjoy the evening and get away from the 'hustle and bustle' of the holiday season and treat yourself to a fun night!

Happy Holidays to everyone!!

Saturday, September 1, 2012

SOTM Fall Favorites Meets the Artiste in August Blog Hop

Day 28 of the Artiste in August Blog Hop!  Ok - I am a few days behind.  But I did tell my blog followers that I was a little behind this week!  So here is my pumpkin box with a cute little tag from the September Stamp of the Month Fall Favorites!  I am "beefing" up my stamp of the month samples for my September events!  There is more to come, so stay tuned!!

Supplies:
Cricut Artiste - pg 78- follow the size in the handbook
Cricut AP - tag - follow size on stamp set
Goldrush, Colonial White and Saddle cardstock
Hemp
NEW Alcohol markers - Autumn Terracotta and Olive
Blending pen and Chocolate stamp pad

Saturday, August 25, 2012

Day 25 of the Artiste in August Blog Hop

If you are hopping with us, then you have arrived from Becca's blog.  

So I met my 'teacher friends' after school today ( just like the old days...) after their first week of school.  I must admit that teaching in Florida is not the same as it was 20 years ago....so I created this gift bag for them and I will start making one for all of my 'peeps'- to cheer them up!

This is the same cut as Day 14 here...  but I just used my decorative scissors to make a fancy cut along the top edge.  I added  a zip strip and some stamping and the bag is done!


Now it is off to Kathy's blog  to check out her artwork!

Here is a list of the bloggers below so you can follow along without getting lost!

Gloria Rogers - http://www.scraptabulousstudio.com/
Rebecca Kings - http://heartfeltcreationsbybecca.blogspot.com
Adeline Brill - www.adeline-brill.blogspot.com   YOU ARE HERE!
Kathy Johnson - http://kathyscreativecorner.com/
Amy Edwards - www.paisleysplayhouse.blogspot.com
Jen Patrick - http://roxybonds-scrappin.blogspot.com/
Pamela O’Connor - http://reflectionsofmyartandsoul.com
Melinda Everitt -  http://ifyoublingit.blogspot.com/
Tina Gale Husong - http://tiggersscrapplace.blogspot.com/

Enjoy! 

Friday, August 24, 2012

Day 24 of the Artiste in August Blog Hop

Well it is Friday, again!!  Only 1 week to go of this absolutely fantastic blog hop!  If you have been hopping with us, then you have just arrived from Becca's blog and I hope she is back!

Today is the day we can select our own shape....so many to choose from!
I am working on my Fall boards for the BIG Kids Krop in September!  I so do wish it were fall here in Tampa, Florida.   but not yet....but next week I may be looking at Hurricane Issac and I am already over it  So at least it is Fall in my craftroom!! 


I copied the idea straight from page 85 in the Idea Book - I changed it alittle but not too much!  I cut 6 of the pumpkin shapes, stamped them and then glued them back to back to create this shape. Rather quick and easy to finish.
Now it is off to Kathy's blog  to check out her artwork!

Here is a list of the bloggers below so you can follow along without getting lost!

Gloria Rogers - http://www.scraptabulousstudio.com/
Rebecca Kings - http://heartfeltcreationsbybecca.blogspot.com
Adeline Brill - www.adeline-brill.blogspot.com   YOU ARE HERE!
Kathy Johnson - http://kathyscreativecorner.com/
Amy Edwards - www.paisleysplayhouse.blogspot.com
Jen Patrick - http://roxybonds-scrappin.blogspot.com/
Pamela O’Connor - http://reflectionsofmyartandsoul.com
Melinda Everitt -  http://ifyoublingit.blogspot.com/
Tina Gale Husong - http://tiggersscrapplace.blogspot.com/

Enjoy! 

Thursday, August 23, 2012

Day 23 of the Artiste in August Blog Hop


Having trouble sizing your designs?  This video from Close to My Heart  explains how to cut the designs to fit the project that you are creating.  Perfect for my project suggestions today.

Today Blog shape is the milk carton.  I was trying to come up with something different so I 'googled' milk carton projects and I found this cute idea from this link
http://monikastamp.wordpress.com/2011/09/11/mini-milk-carton-bat-for-halloween

I cut the milk carton at 5"  and the bat card at 4" - ASBM (as set by machine). I then cut the spider web at 4"  and cut it in half.  Seriously if you are confused, watch this video!  The bat card fits perfectly to the back of the milk carton and I trimmed the spider web to the wings.

I punched circles for the eyes and cut out the ears and fangs freehand style and added the mouth with our NEW Chalk marker!  I did not glue the bottom of the milk carton because I am using the opening for filling the container,


Here are the last two days designs - ready for my Halloween display!

Now it is off to Kathy's blog  to check out her artwork!

Here is a list of the bloggers below so you can follow along without getting lost!

Gloria Rogers - http://www.scraptabulousstudio.com/
Rebecca Kings - http://heartfeltcreationsbybecca.blogspot.com
Adeline Brill - www.adeline-brill.blogspot.com   YOU ARE HERE!
Kathy Johnson - http://kathyscreativecorner.com/
Amy Edwards - www.paisleysplayhouse.blogspot.com
Jen Patrick - http://roxybonds-scrappin.blogspot.com/
Pamela O’Connor - http://reflectionsofmyartandsoul.com
Melinda Everitt -  http://ifyoublingit.blogspot.com/
Tina Gale Husong - http://tiggersscrapplace.blogspot.com/
Denise Hobbs -  http://oklahomainker.blogspot.com/


Enjoy!!

Wednesday, August 22, 2012

Day 22 of the Artiste in August Blog Hop.

Today is a scary day here in Blogville!  Becca is taking a few days off so check out the other ladies post today for their interpretation of the scary topic.  Today's Cricut cut is the Coffin Box!


I am a HUGE Halloween fan and was so excited to see these cuts on the Artiste cartridge.  I have been busy making the Spellbound WTOG.  (I didn't get the last banner flower made...:( )   when I finish the board, I will take another photo.


I cut out the coffin top in Whisper cardstock and the bottom in Slate cardstock.  I spritzed it with a 3:1 ratio of rubbing alcohol to black re-inker.  Use a pizza box as a spray booth!


I created in CCR a fence with a few basic shapes in the Cricut Art Philosophy cartridge and added the cat in proportion to the fence.


I punched out a moon with our small circle punch and then stamped a few bats around the moon.  Here is my design!


Now it is off to Kathy's blog  to check out her artwork!

Here is a list of the bloggers below so you can follow along without getting lost!

Gloria Rogers - http://www.scraptabulousstudio.com/
Rebecca Kings - http://heartfeltcreationsbybecca.blogspot.com
Adeline Brill - www.adeline-brill.blogspot.com   YOU ARE HERE!
Kathy Johnson - http://kathyscreativecorner.com/
Amy Edwards - www.paisleysplayhouse.blogspot.com
Jen Patrick - http://roxybonds-scrappin.blogspot.com/
Pamela O’Connor - http://reflectionsofmyartandsoul.com
Melinda Everitt -  http://ifyoublingit.blogspot.com/
Tina Gale Husong - http://tiggersscrapplace.blogspot.com/
Denise Hobbs -  http://oklahomainker.blogspot.com/


Enjoy!

Tuesday, August 21, 2012

Day 21 of the Artiste in August Blog Hop

I can not believe how fast this month is going!!  Only 9 more days for this blog hop - geez!  If you have been hopping with us, then you have arrived from Beccas' blog

I created this tall box  using a transparency that I had leftover from my teaching days.. (no more overhead projectors anymore!).  Or you can use a 'not so perfect' page protector.

The cricut cut it perfectly - I used the same setting that I do for our cardstock- blade=6  pressure is medium I placed the design in the upper right hand corner along with the transparency and I was able to cut it with no problem.
I filled the box with an assortment of ribbons and plan to use this as a hostess gift in September.  


 Here is another version of the same idea.  I cut out the page protector ASBM (as set by machine) at 5",

 I used 'red line' tape to hold it together after I scored it.

 
Now it is off to Kathy's blog  to check out her artwork!

Here is a list of the bloggers below so you can follow along without getting lost!

Gloria Rogers - http://www.scraptabulousstudio.com/
Rebecca Kings - http://heartfeltcreationsbybecca.blogspot.com
Adeline Brill - www.adeline-brill.blogspot.com   YOU ARE HERE!
Kathy Johnson - http://kathyscreativecorner.com/
Amy Edwards - www.paisleysplayhouse.blogspot.com
Jen Patrick - http://roxybonds-scrappin.blogspot.com/
Pamela O’Connor - http://reflectionsofmyartandsoul.com
Melinda Everitt -  http://ifyoublingit.blogspot.com/
Tina Gale Husong - http://tiggersscrapplace.blogspot.com/
Denise Hobbs -  http://oklahomainker.blogspot.com/


Enjoy!